DIY patch projects for beginners offer a fun, practical way to extend the life of clothing, bags, and fabric items while adding a personal touch. This beginner-friendly approach makes it easy to tackle easy patch projects, whether you’re mending a worn knee, refreshing a backpack, or adding a decorative touch to fabrics. You’ll explore beginner sewing patches and simple techniques for how to patch clothes, using either hand stitches or iron-on options, depending on the fabric and project. With a small starter kit and the right supplies, these fabric patches and quick patch projects deliver durable results without costly equipment. By the end, you’ll gain confidence to customize garments and accessories while enjoying a satisfying, hands-on learning experience.
Beyond the specific steps, think of this topic in broader terms: beginner-friendly garment repairs, simple fabric reinforcements, and creative patches that transform worn pieces. LSI-friendly language uses related ideas such as patching basics, decorative appliques, and upcycling strategies to convey the same craft without jargon. Using ready-made patches, backing fabrics, and fusible web, you practice placement, edge finishing, and stitch control, building skills that translate to a range of textiles. As you gain confidence, you can progress from quick repairs to more expressive projects, including embroidered patches and mixed-texture designs.
Getting Started with DIY Patch Projects for Beginners
DIY patch projects for beginners are a great way to transform worn garments into something fresh and uniquely yours. This introductory approach focuses on approachable techniques, simple tools, and a low-pressure path to durable results. By starting with small, well-scoped patches, you’ll build confidence and momentum without feeling overwhelmed. The goal is to turn frayed knees, bag corners, or faded sleeves into purposeful accents that reflect your personal style.
From the outset, you’ll notice that these projects fit into busy schedules. Descriptive, beginner-friendly options let you work at a comfortable pace while still achieving satisfying outcomes. You’ll learn how patches behave on different fabrics, what edges need for longevity, and how to balance color and texture so repairs look intentional rather than makeshift. This foundation sets the stage for more creative patching as you gain experience.
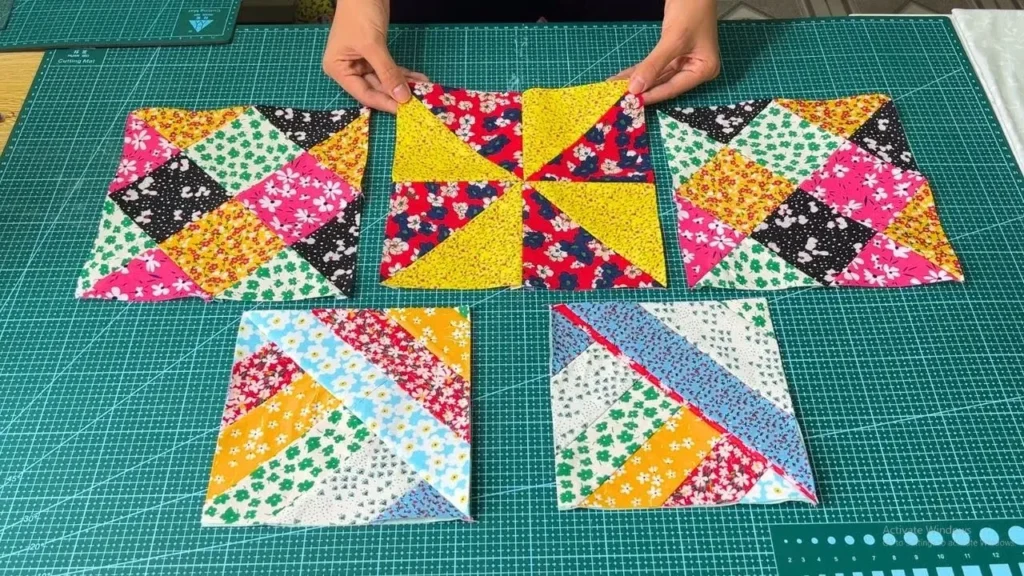
Choosing the Right Patches: Fabric Patches, Readymade, and DIY Options
Choosing patches is the first big decision in any patching project. Fabric patches offer versatility, whether you want a subtle reinforcement or a bold design statement. Readymade options, including iron-on patches, provide quick patch projects that you can complete in minutes, making them ideal for busy beginners. Understanding the difference between iron-on and sew-on patches helps you pick the best method for your fabric and patience level.
Beyond material type, consider patch shapes, weights, and colors to ensure compatibility with your garment. Beginner sewing patches tend to work best when you start with patches that are slightly smaller than the area you’re repairing, with clean, rounded edges to reduce fraying. This thoughtful selection step is a key early skill that influences how durable and visually cohesive your final result will be.
No-Sew and Simple Stitches: Quick Patch Projects for Busy Beginners
No-sew options are a lifeline for truly quick patch projects. Iron-on patches and fusible webs let you reach a polished result with minimal sewing, ideal when you’re pressed for time or just testing the waters of patchwork. Even with no sewing, you can achieve durable results by following product instructions carefully and adding a light edge finish later if you want extra security.
If you do want to sew, starting with simple, deliberate stitches keeps things approachable. A basic running stitch or a tight zigzag around the edge can be enough to secure a patch while you develop consistency in stitch length and tension. This phase is about building practical skills and confidence, so whether you choose no-sew or light hand-stitching, you’ll be practicing one of the most accessible craft techniques.
Denim and Beyond: Patch Ideas for Jeans, Jackets, and Bags
Denim is a forgiving canvas for beginners and a perfect entry point for easy patch projects. Start with simple patches on jeans or a worn jacket to practice edge finishes and placement. Denim’s heft supports a wide range of patch types, from heavyweight fabric patches to decorative embroidery over the patch area, letting you experiment with texture while keeping things durable.
As you gain comfort, extend patch ideas to bags and backpacks, where sturdy materials and frequent handling test the longevity of your repairs. Fabric patches in contrasting colors or unexpected shapes can refresh a tired backpack while teaching you how to balance visual impact with structural integrity. This exploration helps you see how patching can be both functional and expressive.
How to Patch Clothes: A Beginner-Friendly Methodology
A repeatable, beginner-friendly approach makes how to patch clothes feel achievable. Start with a small patch and a simple seam, then gradually expand to larger or more complex designs. This method centers on proper patch placement, secure backing, and a steady stitch that remains comfortable as you learn tension and stitch length.
Using chalk to mark placement, pins to hold patches in place, and fusible backing to stabilize delicate fabrics creates a reliable workflow. As you practice, you’ll notice how different fabrics respond to heat, stitching, and edge finishing, allowing you to adjust techniques while maintaining a neat, durable appearance.
Care, Maintenance, and Creative Aftercare: Extending Patched Pieces
Patched garments demand thoughtful care to maximize their life. Turn items inside out during washing and avoid high heat on patches that rely on heat-activated backing. Regular topstitching and gentle handling during cleaning help patches stay securely attached and looking cohesive over time. This maintenance mindset mirrors the deliberate practice you’ve developed with easy patch projects.
Beyond care, patched pieces invite ongoing creativity. As you build confidence, you can layer more patches, experiment with different fabrics, or even create small patchwork panels. Maintaining a balance between durability and design ensures your patches remain a cherished, personalized feature of your wardrobe, showcasing your growing skills in fabric patches and quick patch projects.
Frequently Asked Questions
What is the easiest DIY patch project for beginners to start with, and what basic supplies will I need?
A simple DIY patch projects for beginners can be a patch on a worn denim knee or bag pocket. Gather a patch (iron-on or sew-on), backing fabric if you want extra durability, a needle and thread, sharp scissors, pins, an iron, chalk or a fabric marker, and optional fusible interfacing. Place the patch, apply heat for iron-on backing or baste with a few stitches, then sew around the edge with a running stitch or small zigzag for durability. This quick, beginner-friendly approach delivers a visible, satisfying result without needing professional help.
How should I choose fabric patches for beginner sewing patches to ensure durability and a good look?
When selecting fabric patches for beginner sewing patches, match the patch weight to the garment (heavier fabrics like denim pair with sturdy patches). Decide between iron-on patches for a quick no-sew option or sew-on patches for longer-lasting security. Pre-wash your fabrics and patches to reduce shrinking or fraying, and consider adding fusible interfacing for extra stiffness on delicate fabrics. Choose colors and shapes that complement the item to keep DIY patch projects for beginners visually balanced.
What are some quick patch projects for beginners that deliver visible results without using a sewing machine?
Try iron-on patches on a bag or backpack for quick patch projects. Choose patches with heat-activated backing, place them where you want, and press with a hot iron as instructed. For added security, stitch around the border with a simple running stitch or a zigzag stitch if you’re comfortable with a machine later. These quick patch projects give you an immediate, satisfying result and don’t require a sewing machine.
How do I patch clothes in a beginner-friendly, step-by-step way?
A beginner-friendly approach to how to patch clothes: Step 1 prepare the fabric and patch materials (pre-wash fabrics and patches). Step 2 position patches for effectiveness and balance, marking outlines with chalk if needed. Step 3 secure patches with pins or a temporary adhesive, using fusible backing if applicable. Step 4 sew with a simple running stitch along the edge, and Step 5 finish with a neat edge, such as a small topstitch or satin stitch, for durability and a clean look.
What common mistakes should beginners avoid when tackling easy patch projects for beginners?
Avoid common missteps like choosing patches that don’t match the garment’s fabric weight, skipping interfacing on thin fabrics, cutting jagged shapes, using too little stitching near the edges, or skipping pre-washing. Pay attention to edge finishing and fabric compatibility to ensure the patch remains durable and looks intentional in your DIY patch projects for beginners.
What care and maintenance steps help extend the life of fabric patches on patched garments?
Care for patched pieces by turning items inside out when washing and avoiding high heat once patches have set. Air-dry or tumble-dry on low heat to protect edges. For sewn patches, inspect stitches regularly and re-sew any loose areas. With proper care, fabric patches last longer and keep DIY patch projects for beginners looking fresh and durable.
| Key Point | Overview |
|---|---|
| Introduction | DIY patch projects for beginners can be a fun, practical way to extend the life of clothing, bags, and fabric items while adding a personal touch. This guide is designed for people just starting out with patching ideas, offering clear steps, beginner-friendly techniques, and plenty of quick wins. |
| Why patches are beginner-friendly | Patches are forgiving and versatile: they can be hand-sewn or secured with fabric glue or fusible web, so a sewing machine isn’t always required. They introduce basic sewing terminology, stitch types, and fabric behavior, while delivering immediate visual rewards as old items become refreshed. |
| What you’ll need: basic supplies | – Patches: readymade iron-on or sew-on, or cut-your-own from scrap fabric – Fabric backing: sturdy material for extra durability – Needle and thread: sharp needle with lightweight, matching thread – Scissors: small, sharp fabric scissors – Fusible interfacing or lightweight fusible web – Pins or fabric clips – Iron and ironing board – Chalk or fabric marker – Optional glue: fabric glue or temporary adhesive spray |
| Low-tech vs. speed options | If you want to go low-tech, many patches can be secured with hand-stitching. For speed, iron-on patches or fusible interfacing give quick, sturdy results. Either way, practice makes patches look intentional and stylish. |
| 1) Denim elbow patch (project idea) | Cut a patch slightly larger than the hole; back with interfacing if added durability is needed. Steps: place, back with backing (iron-on or bast a few running stitches), sew edge with running or satin stitch, optional contrasting edge-stitch for decoration. |
| 2) Iron-on patches for a bag/backpack (no-sew option) | Choose patches with heat-activated backing. Position on bag, cover with cloth, press with hot iron per instructions. For extra security, stitch around the border with a running stitch or zigzag later. |
| 3) Simple patch for worn knee/elbow on jeans | Cut a round or rounded-rectangle patch from sturdy denim/canvas. Double-layer edge for durability. Center, baste, sew around edge (straight or small zigzag), wash after set to firm stitches. |
| 4) Small decorative patches on a denim jacket | Lay out patches to test composition. Apply iron-on patches, then add embroidery or topstitching. For sew-on patches, sew around the border with a tight zigzag to secure. |
| 5) Tiny fabric patches for repairs or accents | Cut small shapes from scrap fabric; round edges. Pre-wash fabrics to prevent shrinking. Place patches, secure with stitches or light fabric glue, finish with a secure border stitch. |
| How to patch clothes: a beginner-friendly approach | 1) Prepare fabric and patches (pre-wash) 2) Position patches for effectiveness and balance 3) Secure with pins or temporary adhesive; if using fusible, place backing accordingly 4) Sew with a simple running stitch for practice 5) Finish with a neat edge, using small topstitch or satin stitch for durability |
| Common mistakes and how to avoid them | – Using the wrong fabric for patches: match weight/weave to garment for durability – Skipping interfacing on knit or thin fabrics – Cutting jagged shapes; round/soft curves wear longer – Too little stitching around edges – Not washing fabrics before patching to stabilize shrinking/distortion |
| Care and maintenance | Turn items inside out when washing to protect patches. Avoid high heat for iron-on patches until fully adhered; air-dry or use low heat. For sewn patches, maintain regular stitch length and occasional topstitching to extend life. |
| Mindset of patching | Patches are opportunities to learn, experiment, and express personal style. Each successful patch builds confidence and opens doors to more complex sewing tasks as you gain familiarity with fabrics, stitches, and textures. |
Summary
DIY patch projects for beginners offer a practical path to quick wins and longer-lasting wardrobe pieces. With affordable supplies, straightforward techniques, and endless creative possibilities, patching is a flexible skill that grows with you. Whether you’re aiming to repair, personalize, or repurpose, the core ideas stay the same: prepare your materials, choose patches that suit your fabric, and practice steady, confident stitches. Start with one easy project, celebrate your progress, and gradually tackle more challenging patches as your confidence builds. The result is not only durable repairs but a wardrobe that reflects your unique style.