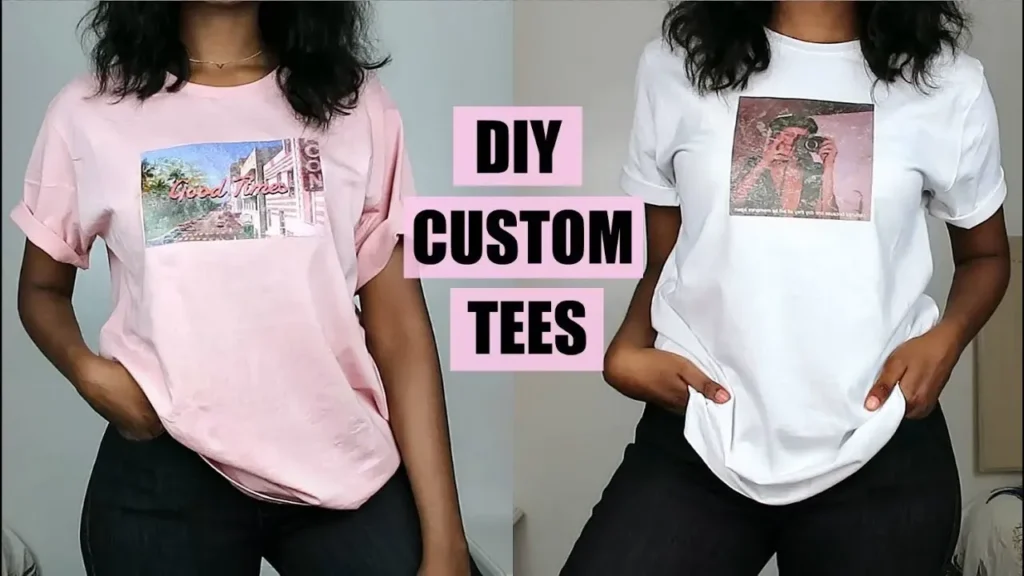
DIY Custom Shirts open a hands-on avenue for expressing creativity, turning simple fabrics into personalized gifts or a side business from home. With at-home printing becoming accessible to beginners, you can start experimenting with iron-on transfers and beginner screen printing without a big upfront investment, practice on inexpensive blanks, and quickly see what works. If you’re new to t-shirt printing for beginners, this guide compares iron-on transfers with beginner screen printing to help you decide which method fits your space, budget, and daily workflows. You’ll learn practical tips to get durable results and keep the setup simple, so the process stays fun and achievable for a small, home-based project in DIY apparel printing. By the end, you’ll have a clear plan to start producing your own designs on tees, test different fabrics, and shop smarter for supplies that fit your budget and space, while inspiring you to share your work with friends and family.
From a broader perspective, the concept translates to home-based apparel customization, where designers craft and apply unique graphics to tees using simple tools. You can frame this as at-home garment printing, a practical approach for small runs that keeps costs low while letting you iterate quickly. Other related terms you’ll encounter include DIY tee design, heat-transfer methods, and entry-level screen-print setups that still deliver professional-looking results. The underlying idea remains the same: practice, experiment with fabrics and placements, and build a repeatable workflow that scales from hobby projects to personal or small-batch apparel.
DIY Custom Shirts: Getting Started with at-Home Printing for Beginners
DIY Custom Shirts open a hands-on outlet for creativity, gifts, or a side business you can build from home. The idea that at-home printing is within reach for beginners is a game changer: you can design custom tees, print them with affordable methods, and learn a marketable skill without needing a full workshop.
This beginner’s guide focuses on the core options—iron-on transfers and beginner screen printing—and provides practical tips to help you achieve durable results even if you’re starting with a tiny stash of supplies. By choosing a method that fits your space and budget, you can begin DIY apparel printing sooner than you think.
Choosing Your Path: Iron-On Transfers vs. Beginner Screen Printing
When you’re deciding which path to start with, iron-on transfers are popular for at-home printing because they require minimal space and equipment. They’re ideal for quick results and low upfront costs, making DIY apparel printing accessible for beginners.
Beginner screen printing offers a path to larger runs and a tougher, more durable finish. With a basic screen printing kit, emulsion, a squeegee, and a small stash of screens, you can create a professional feel suitable for t-shirt printing for beginners who want consistent results.
Iron-On Transfers: A Step-by-Step Starter Guide
Iron-on transfers provide a straightforward workflow you can follow at home. Start by designing your image, printing it in mirror image on transfer paper with your home printer, and preparing a smooth shirt surface for adhesion.
Apply heat with a household iron or heat press, then peel the liner after the design cools. A light final heat cure helps set the image for longer wear. This approach is well suited to small batches and gift projects while staying within a tight budget for at-home printing.
Beginner Screen Printing: A Practical Path to Durable Tees
Beginner screen printing requires a simple setup: a screen printing kit with a frame, stencil or design, a squeegee, and ink, plus a way to cure the print. Even a basic setup can yield more durable finishes than iron-on transfers when you print multiple shirts.
Design placement and crisp lines come from aligning the screen, applying ink with a steady stroke, and curing properly with heat. After printing, flip shirts to wash, and follow care instructions to extend the print’s life.
Budget-Friendly Materials and Setup for DIY Apparel Printing
To keep costs down, assemble a lean setup that covers your needs for at-home printing. For iron-ons, you need a printer, transfer paper, scissors, an ironing surface, a steady iron, and a few shirts. For beginner screen printing, a basic kit, emulsion, a few screens, and a heat source for curing are enough to start.
Choose fabrics like 100% cotton tees for the best results, as they take ink and transfers more consistently. Working with budget-friendly options helps you test designs in the early stages of DIY apparel printing.
Design, Care, and Common Pitfalls for Consistent at-Home Prints
Design ideas matter: start with bold, high-contrast elements and test on inexpensive fabrics to see how prints hold up on at-home printing. Use printer-friendly fonts and clear shapes to maximize legibility on both iron-ons and screens.
Common mistakes include inadequate prep, misalignment, and inconsistent pressure. Learn to use a jig or tape, ensure fabrics are dry, and follow curing and wash instructions to avoid fading or cracking, enabling better long-term results in DIY Custom Shirts or any at-home prints.
Frequently Asked Questions
What is the best starting method for DIY Custom Shirts: at-home printing with iron-on transfers or beginner screen printing?
For DIY Custom Shirts, at-home printing with iron-on transfers is ideal for quick results and minimal space. It’s great for testing designs in a day or two and keeping upfront costs low. If you later want more durability or larger runs, beginner screen printing is a solid next step.
How do I apply iron-on transfers on DIY Custom Shirts as a beginner?
Design your image and print it in mirror image on transfer paper, then cut and position it on the shirt. Use a household iron or heat press with firm, even pressure, then peel the liner and, if recommended, apply a light second heat to cure. Let the print set for 24 hours before washing for best durability.
What equipment do I need for beginner screen printing in DIY Custom Shirts?
A basic screen printing setup helps you achieve durable prints: a screen printing kit (frame, squeegee, ink), emulsions or stencils, a few screens, and a heat source to cure the ink. Start small, then add more screens or colors as you gain confidence in DIY apparel printing.
What tips help ensure durability for DIY Custom Shirts printed at home?
Prep is key: wash fabrics before printing, use quality supplies, and follow proper curing times with heat. Cure the ink or transfer fully, wash prints inside out, and avoid high-heat drying to extend shirt life in DIY Custom Shirts.
Which fabrics work best for at-home printing on DIY Custom Shirts?
100% cotton tees or cotton blends generally yield the best results for DIY apparel printing. Some blends can work well with iron-on transfers and screen printing, but fiber content influences adhesion and the feel of the print on your DIY Custom Shirts.
How should I plan designs for t-shirt printing for beginners as part of DIY Custom Shirts?
Start with bold, simple designs and high-contrast colors. Use mock-up templates to plan sizing and placement across shirts, test designs on inexpensive blanks, and iterate based on how they print for your DIY Custom Shirts.
| Topic | Key Points |
|---|---|
| Introduction | DIY Custom Shirts offer a hands-on way to express creativity, make personalized gifts, or run a small home business; beginner-friendly at-home printing is within reach with iron-ons or beginner screen printing. |
| At-home printing options | Two main paths for beginners: iron-on transfers (low space, quick results) and beginner screen printing (durable finish, scalable for larger runs). |
| Choosing a method for beginners | Decide based on quantity, fabric feel, space, and timeline: iron-ons for speed and experimentation; screen printing for durability and larger batches. |
| Iron-on transfers: steps | Design and print in mirror image; prep shirt; cut/position design; heat with iron or heat press; peel and cure; wait 24 hours before washing and follow cold-wash, inside-out care. |
| Beginner screen printing: steps | Gather a basic kit; transfer design to screen; align on shirt; use a steady squeegee stroke; cure with heat; wash care as directed; yields durable, repeatable prints. |
| Materials and setup on a budget | Iron-ons: printer, transfer paper, scissors, ironing board, iron, shirts. Screen printing: basic kit, emulsion, screens, squeegees, curing heat. Favor 100% cotton tees or cotton blends for best results. |
| Design ideas and practical tips | Start with bold, high-contrast designs; consider fabric color and ink compatibility; use readable fonts; keep a design mock-up and placement templates for consistency. |
| Common mistakes and how to avoid them | Inadequate prep, alignment issues, inconsistent pressure, and improper curing can ruin results; avoid by thorough fabric prep, alignment aids, steady technique, and following cure times precisely. |
| Care, maintenance, and expanding beyond beginners | Wash prints inside out in cold water; store inks and papers properly; consider upgrading to a basic heat press or stronger screen setup for regular printing; experiment with colors, textures, and layering. |
| Final thoughts | Whether you start with iron-ons or screen printing, DIY Custom Shirts offer a practical path to learning a new skill, expressing creativity, and producing unique shirts through small, iterative projects. |
Summary
DIY Custom Shirts invite you to a creative journey of at-home apparel printing. This descriptive overview highlights practical paths from iron-on transfers to beginner screen printing, showing how you can start small, learn heat-tuning and curing, and gradually scale to durable, personalized shirts. With careful practice, you can test designs, improve techniques, and build a satisfying portfolio of DIY Custom Shirts you print, wear, and share.