Embroidered patches add timeless charm to clothing, bags, and gear, turning everyday items into personal statements. From classic flat embroidery to bold chenille textures, embroidered patches styles span a spectrum that suits casual, athletic, and formal looks. Embroidered patches can be applied with iron-on patches for quick styling or sew-on patches when you want lasting security. If you’re creating a line of custom patches, you’ll want to consider backing, borders, and thread colors to maximize impact. To keep designs vibrant, follow simple patch care tips that extend wear, wash after wash.
Beyond calling them patches, you’ll find related terms like embroidered badges, fabric emblems, and stitched patches that achieve the same decorative purpose on clothing. These textile accents can be created as appliques or badges, aligning with branding, clubs, or personal stories while leveraging similar color and stitch vocabulary. Whether you choose custom patches with iron-on backing or opt for sew-on finishes, the idea is to attach durable, visually appealing motifs. Understanding these related concepts helps you plan cohesive looks across items and seasons.
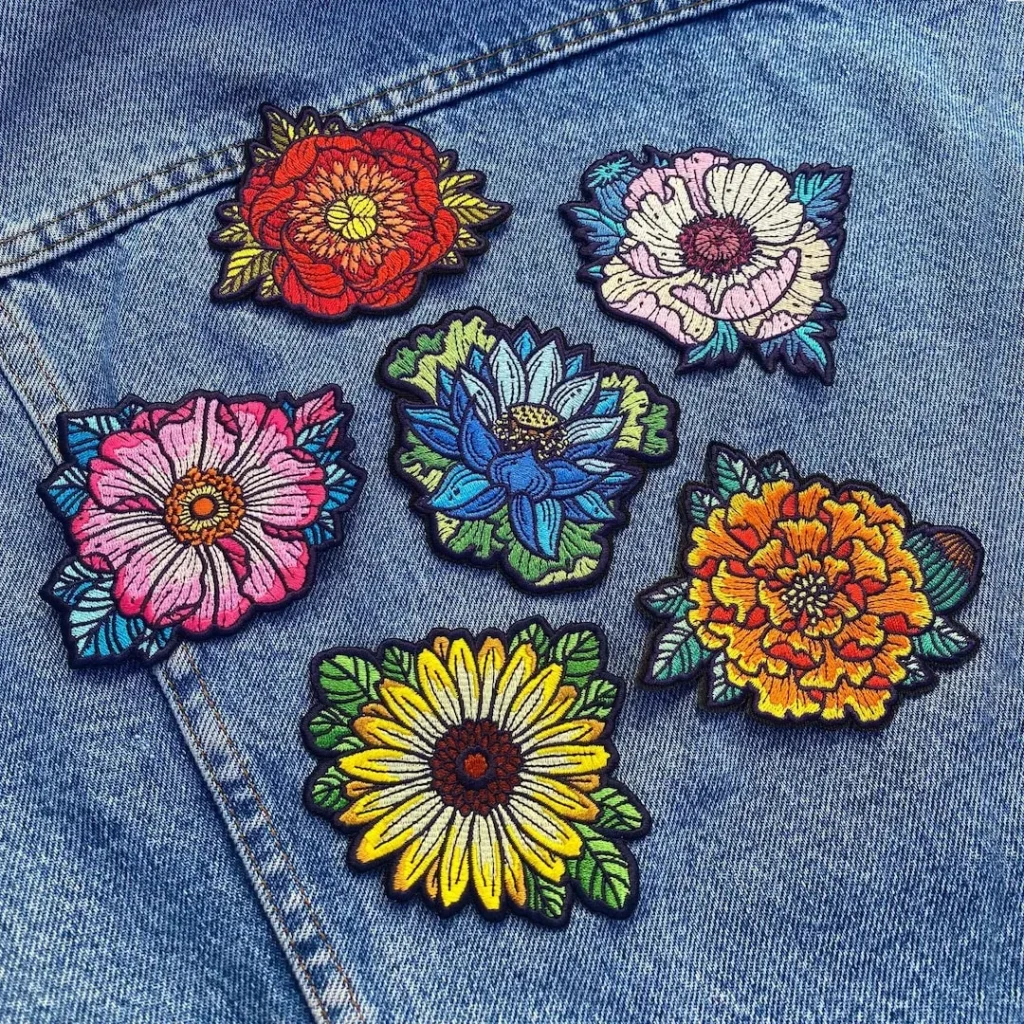
Embroidered Patches Styles: Flat, 3D Puff, Chenille, and More
Understanding embroidered patches styles means recognizing how lines, fills, and textures translate on fabric—whether you prefer flat embroidery for a clean, detailed look or something more tactile like 3D puff or plush chenille. Each style creates a distinct vibe, from bold club insignias to vintage collegiate vibes, and the finish on the edge or border can dramatically affect wearability on different garments.
When choosing a style, consider fabric type (denim, twill, knit), garment function (workwear, fashion, outerwear), and the narrative your patch communicates. Backing options, border finish, and patch silhouette all influence the final look, so test a few combinations to see which texture and thickness best express your story.
Iron-On Patches vs. Sew-On Patches: Practical Attachment Guide
Iron-on patches use a heat-activated adhesive on the back, making them quick to apply on sturdy fabrics like denim, canvas, or twill. For best results, preheat the fabric, place the patch where you want it, cover with a pressing cloth, and press firmly from the center outward for about 15–30 seconds.
Sew-on patches provide lasting stability, especially on delicate fabrics or patches with curved edges. Use a sharp needle, strong thread, and a tight stitch length around the border; reinforce with a zigzag stitch if your machine supports it. For thicker patches or layered designs, sewing from the inside of the garment can help maintain a clean surface.
Custom Patches for Teams, Clubs, and Personal Identity
Custom patches are ideal for teams, clubs, brands, and personal narratives, helping create a cohesive look across jerseys, bags, hats, and gear. They signal belonging and pride, turning ordinary items into recognizable symbols of identity.
Design decisions matter: shape, size, colors, and the right backing (Velcro for easy swapability or traditional sew-on for durability) affect wear, wash cycles, and budget. Plan ahead to balance boldness with practicality, ensuring patches stay legible and secure over time.
Applying Patches with Confidence: Pro Tips for Lasting Results
Applying patches confidently begins with preparation: test placement on an inside area, choose heat settings appropriate for the fabric, and use a pressing cloth to protect the surface. Ensure the patch lies flat and is centered before applying heat to prevent warping.
Pro tips for finishing include maintaining even heat and pressure, letting patches cool fully before handling, and testing adhesion after washing if iron-on patches were used. Following these patch care tips helps prevent edges from lifting and preserves color and texture across multiple wears.
Care and Longevity: Patch Care Tips to Preserve Color and Stitching
Care and longevity start with washing and drying guidelines: iron-on patches typically fare best with gentle cycles and cold to warm water, while sew-on patches tolerate standard washing. Turn garments inside out to protect the patch and reduce abrasion on the surface.
For both iron-on and sew-on patches, air-drying is ideal; if you must use a dryer, choose a low heat setting. Store patches flat when not in use and inspect edges for fraying. Patch care tips also include resecuring lifts promptly, and using a fabric-safe sealant around borders in high-friction areas if needed.
Styling with Patches: Placement, Backing, and Color for Maximum Impact
Styling with patches hinges on thoughtful placement, appropriate size, and a deliberate color strategy. Large patches make bold statements on jackets or backpacks, while smaller patches create a curated, mixed-look across sleeves, pockets, or hems.
Backing and color choices matter: Velcro or removable backings offer quick swaps for uniforms or seasonal themes, and matching or contrasting thread colors can unify or highlight the patch design. For enthusiasts of embroidered patches, coordinate the palette across patches to achieve a cohesive, intentional look.
Frequently Asked Questions
What are the most common embroidered patches styles, and how do I choose the right one for my project?
Embroidered patches styles include flat embroidery, 3D puff embroidery, chenille, and layered/appliqué, plus various borders and shapes. To choose, consider the fabric and the look you want (bold versus refined) and your target audience; for teams or clubs, bold chenille or puff options can convey energy, while flat embroidery suits a more formal item. If you’re designing custom patches, also think about backing and edge finish to match the style.
How do I apply embroidered patches using iron-on patches or sew-on patches, and which fabrics work best?
For iron-on patches, preheat the iron to the fabric setting, place the patch, cover with a cloth, press firmly for 15–30 seconds from the center outward, and cool before testing; re-press after washing for extra security. For sew-on patches, stitch around the edge with a tight running stitch or backstitch; a zigzag edge can help on textured fabrics. Denim, twill, and canvas are ideal for iron-on patches, while delicate fabrics may be better suited to sew-on patches.
What are the patch care tips to keep embroidered patches looking vibrant and secure?
Follow patch care tips like washing garments inside out on a gentle cycle with cold or warm water, depending on the patch guidelines, and air-drying or using a low heat setting. Inspect edges and re-secure if needed, and avoid high heat that can loosen adhesives or fade colors. Store patches flat or rolled when not in use to prevent deformation.
Can embroidered patches be used on different fabrics, and which backing should I choose for best results?
Yes—most fabrics like denim, canvas, and twill work well, while delicate materials may require sew-on patches or gentler adhesives. Choose backing based on wear and care: iron-on for quick application, sew-on for durability, Velcro for interchangeable designs, or removable/backing options for versatility. Always test on an inconspicuous area first.
Are embroidered patches durable enough for uniforms or sports teams, and what backing is best for longevity?
For uniforms or team gear, sew-on patches offer the best durability, while Velcro backings allow easy swaps; iron-on patches are convenient but may lose adhesion with frequent washing. For longevity, select sturdy embroidery, strong edge finishes, and consider professional backings when available for custom patches.
What factors should I consider when selecting embroidered patches for a project, including size, color, border, and backing?
Consider garment color and placement, patch size and shape for visibility, thread colors that contrast or harmonize with the item, and the border finish (merrow, satin, or plain). Backing type (iron-on, sew-on, Velcro, or removable) and your budget matter too, especially for custom patches whose design must scale and remain legible at the chosen size.
| Topic | Key Points |
|---|---|
| Introduction |
, |
| What are Embroidered Patches? |
|
| Styles |
|
| Application Methods |
|
| Care and Maintenance |
|
| Choosing Patches |
|
| DIY Ideas & Uses |
|
| Maintenance Routine |
|
Summary
Embroidered patches offer a highly customizable, durable, and stylish way to update clothing and accessories. By understanding the different styles of embroidered patches, choosing the right application method, and following practical care tips, you can enjoy vibrant designs that endure daily wear. Whether you’re revamping a personal item, outfitting a team, or creating a thoughtful gift, embroidered patches empower you to tell your story in color and texture. Embrace the creativity of patches—your wardrobe, backpack, and gear will thank you with lasting character and style.